The normal cosmetic applicators are generally disposable, but the Beauty Blenders and other similar sponges have been conceived and designed for prolonged use over time. As such, they require regular cleaning that removes harmful stains and bacteria.
 Basic Cleaning
Make some soapy water. Fill a bowl with warm water and add a few drops of mild soap or shampoo. Stir lightly, until foam forms on the surface.
- Baby shampoos and organic “gentle” shampoos work particularly well, but you can use any type of cleanser that is considered safe for hair and skin.
Soak the sponge for 30 minutes. Dip it in the soapy water and squeeze it two or three times with your hands, then let it soak for about half an hour.
- Make sure there is enough water in the bowl to completely cover the applicator – you can add more if you think it’s necessary.
- As it is absorbed, the water will begin to change color: it will take on the beige or light brown hue of the foundation and other cosmetics that the sponge is impregnated with.
- By saturating with water, the applicator will expand to its original size.
Also Read: Best Fake Eyelashes That Look Natural
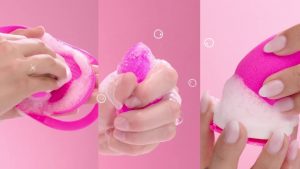
Apply a cleaning product to the sponge. Rub it gently with a specific solid detergent or equivalent soap, directly on the dirtiest areas. Use a mild cleanser to avoid damaging the applicator. Among solid products, Castile soap typically works very well. If you prefer a liquid cleanser, choose a moisturizing shampoo for children or an organic one with a delicate formula.
- Continue to rub the cleaner for about three minutes, using only your fingertips: do not use a brush or some other abrasive tool, as this could damage the sponge.
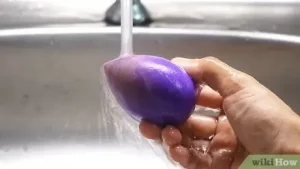
Rinse the sponge. Use warm running water to get rid of all traces of detergent. At this stage, all make-up residues will also be removed.
- You will need to squeeze it gently under running water to remove the soap and residue from makeup products.
Check that it is clean enough after rinsing. If you see that the water is flowing clear from the sponge, you can move on to the drying phase; but if it still appears dirty, it is advisable to do an advanced cleaning (go to the “Deep Cleaning” section of this article).
Dry the sponge with kitchen paper. Remove excess water by gently squeezing the applicator, then roll it onto clean kitchen paper, which will absorb any residual moisture.
- If it is still wet, leave it in the air and wait until it is completely dry before using it.
Things you will need
- A small bowl
- Waterfall
- Mild, solid, or liquid detergent
- Sink
- Kitchen paper
Also Read: The Best Teeth Whitening Products Ever
 Deep Cleaning
Do a deep cleaning of the sponge if you feel it is necessary. Generally speaking, you will need to do this if it still looks dirty after going through the basic cleaning steps.
- This is likely to happen if you use it several times a day or if you have forgotten to clean it for a week or more.
- Check the applicator to see if it needs a deep clean. You will have to do it if, after drying, there are still stains or if the rinsing water is still dirty after basic cleaning.
Wet the sponge. Keep it under warm running water for about 30-60 seconds or until it has absorbed so much water that it returns to its original size.
- You can also soak it in a bowl of hot water for between 5 and 10 minutes. You don’t need to use soap and you won’t have to wait for the water to change color before moving on to the next step.
Apply the cleanser to the stained areas. Dab the soap, solid or liquid, directly on the areas of the sponge that appear very dirty.
- Again, make sure you use a mild cleanser. A specific “Applicator Cleaner” works well; but there are other options, just as effective, such as solid castile soap, a liquid shampoo for children, or an organic shampoo for sensitive skin.
Rub the sponge with the palm of your hand. Rub the stained areas for about 30 seconds, making small circular movements against the center of the hand.
- The wash should be a little more vigorous and intense than the one used for the basic cleaning, but take care to be gentle enough not to tear the sponge or alter its shape.
- As you rub, the debris of deeply penetrated cosmetics will tend to rise to the surface: you will notice that the foam will take on the color of the foundation.
Rinse while continuing to scrub. Hold the sponge under warm running water and continue rubbing against the palm in circular motions, until you see no more foam.
- You may need to continue rinsing for several minutes – it’s important to get rid of all the soap, so don’t rush.
Examine the applicator. Apply more cleanser and rub it again against your palm – it will be clean if you see white foam instead of gray or beige.
- Rinse the sponge again under running water until the foam has completely disappeared.
Dry the make-up applicator. Gently squeeze it with your hand to get rid of most of the water; then let it run over clean kitchen paper to dry better.
- It will still be damp after this step, so leave it in the air in a dry place. Use it only when it will no longer have any trace of moisture.
Things you will need
- Mild, solid, or liquid detergent
- Sink
- Kitchen paper
Also Read: Best Lashes For Monolids
 Hot Sterilization
Sterilize the sponge monthly. Even if you clean it weekly, you should hot disinfect it at least once a month, especially if you use it every day. Regular cleaning removes surface bacteria, but to eliminate even those that lurk deeply, you will need to use a short blast of intense heat.
- If you notice a rapid build-up of bacteria, the sponge may need to be sterilized more frequently. You notice bacterial overgrowth if you start to suffer from atypical acne breakouts or when the inside of the applicator gives off a rancid or unusual odor.
- Keep in mind that you will still need to perform a basic cleaning after sterilization, as this kills bacteria but does not remove cosmetic stains.
Put the sponge in a bowl of water. Place it in the center of a microwave-safe container containing about 1 inch of water.
- The applicator must be immersed in water: otherwise, it could catch fire or the material it is made of could be damaged.
Start the microwave. Insert the bowl, without covering it, and turn the appliance on at maximum power for 30 seconds.
- While the oven is in operation, keep an eye on the sponge and do not be alarmed if it expands slightly or if small traces of smoke develop; take care, instead, to switch off the appliance immediately if it swells excessively or if you see dense smoke forming.
Let it rest. Wait a couple of minutes before removing the bowl from the microwave and removing the sponge from the water.
- The applicator will be very hot once the heating cycle is over: the waiting time is just for your safety. You can touch it as soon as it has cooled down sufficiently.
Dry the sponge. Roll it gently onto a sheet of kitchen paper, then keep it at room temperature until completely dry.
- If you intend to do basic cleaning after heat sterilization, you can proceed as soon as you take it out of the microwave, without waiting for it to dry.
- Wait until the applicator is completely dry before using it again.
Things you will need
- A microwave-safe bowl
- Waterfall
- Microwave oven
- Kitchen paper
Also Read: Best Lashes for Almond Eyes
How to Clean Make-Up Sponges | Video Explanation
Conclusion
Proper cleaning of make-up brushes and sponges is important to keep your skin healthy and bacteria-free. Remember to rinse and dry the sponge completely before using it again. Never use hot water or put them in the dishwasher! To keep your make-up brushes and sponges as clean as possible, clean them at least once a week.
 Cosmetics Capture is an online shop where you can find the best and certified Makeup, Beauty and Personal Care products For all genders.